Convert a Selenium IDE Test to a RealLoad Test
This example shows how a Selenium IDE Test - which was recorded with a Chrome or Firefox web browser - can be converted into a RealLoad ‘Test’. The converted RealLoad ‘Test’ can then be executed both as a Load Test Job and as a Monitoring Job. In addition, the converted test can also be part of a Test Suite for performing Regression Tests.
In most cases, the conversion can be done easily with just a few mouse clicks - without the need for any special settings.
At the end of each executed test run (of the converted RealLoad test), a final screenshot of the simulated web browser session is taken for each virtual user so that you can check whether the web browser session of the virtual user has been fully executed.
Tip: If possible, always use the Chrome web browser for Selenium IDE recording, as Chrome sessions are simulated much faster (= more realistic) than Firefox sessions.
Pre-requisites
To configure and execute this test you’ll need:
- Access to the Real Load portal. If you haven’t signed up, do so first: Sign Up
- Approx. 20..30 minutes of your time
- A cup of tea or coffee
1. Export the Selenium IDE Test as JUnit Test
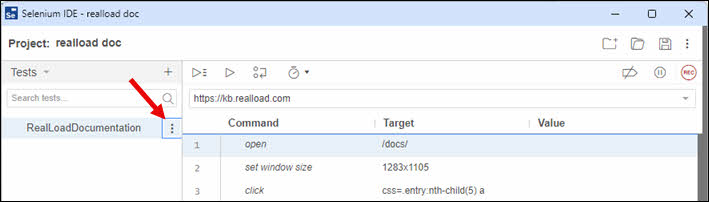
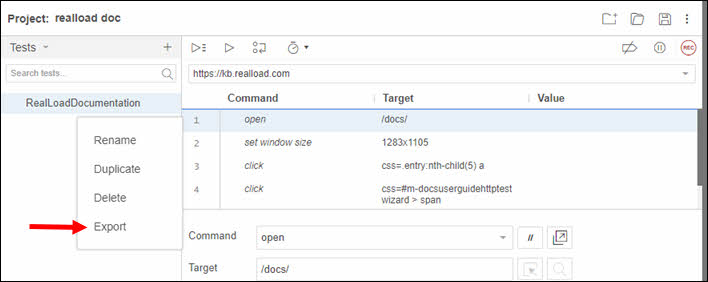
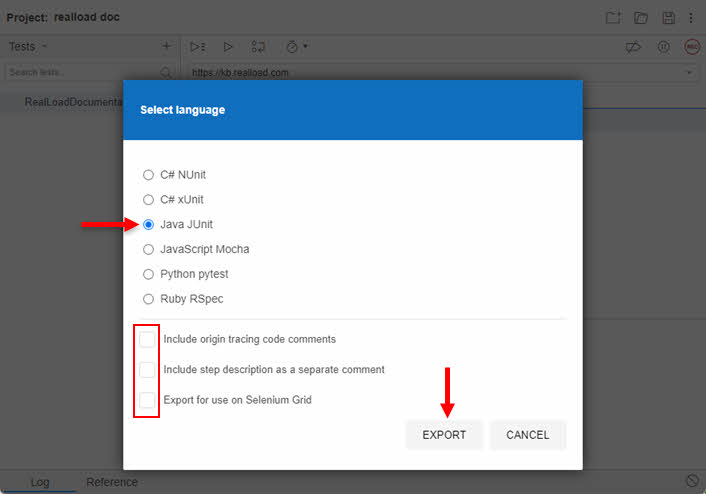
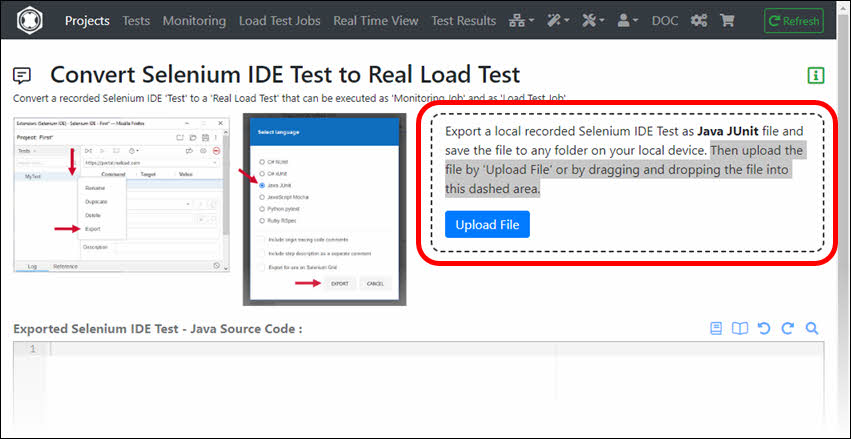
Export the your recorded Selenium IDE Test as Java JUnit file and save the file to any folder on your local device. Note that the 3-dot dropdown icon may initially be hidden and may only appear when you are near to the Selenium ‘Test Case’ area. Do not choose any export option.
2. Upload the exported Selenium JUnit File
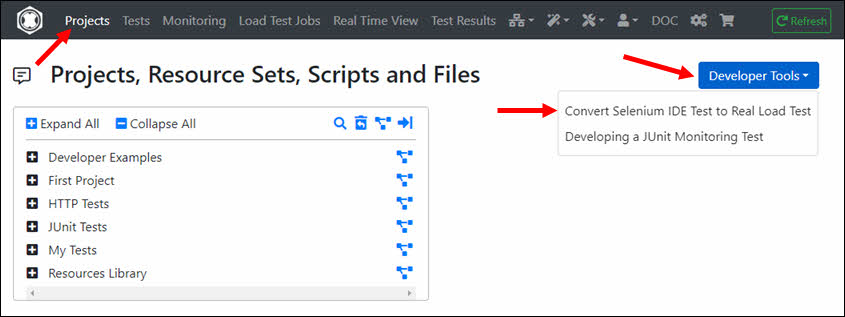
At Projects menu click on the ‘Developer Tools’ dropdown and select ‘Convert Selenium IDE Test to Real Load Test’.
Then upload the file by ‘Upload File’ or by dragging and dropping the file into the dashed area.
3. Convert the Uploaded JUnit File
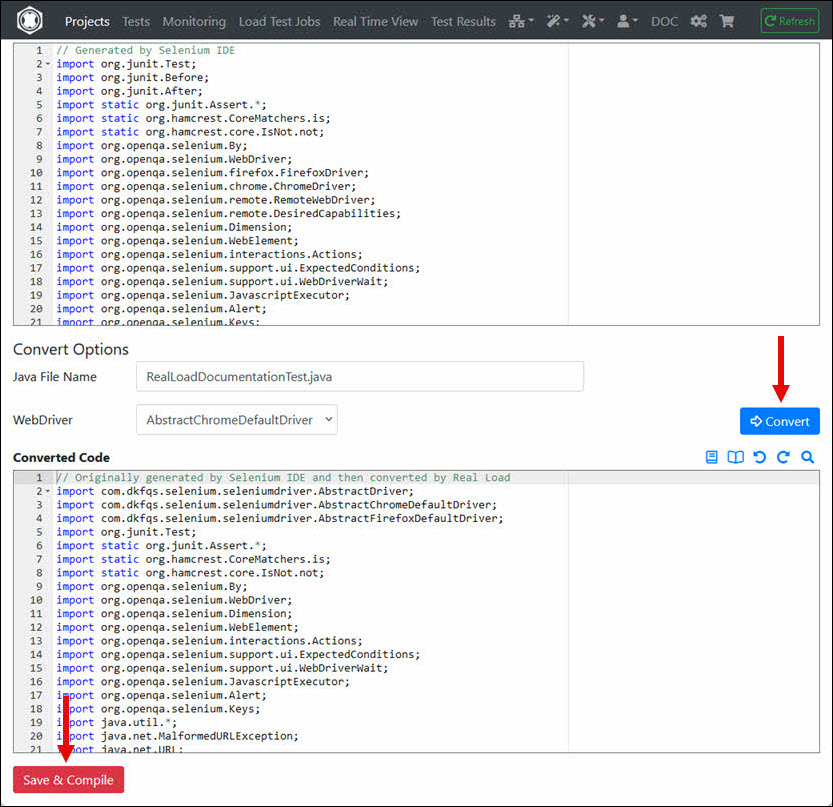
Click on the ‘Convert’ button after uploading the file. The converted Java code is then displayed. Then click on the ‘Save & Compile’ button.
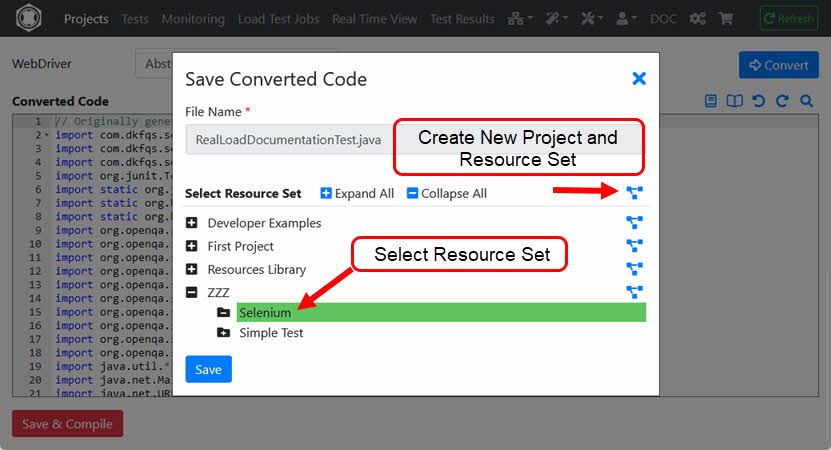
You have to save the converted code in a Resource Set of a Project. You can also first create a new Project with a new Resource Set.
After saving the converted code, you will be automatically redirected to the Compile Java File dialog.
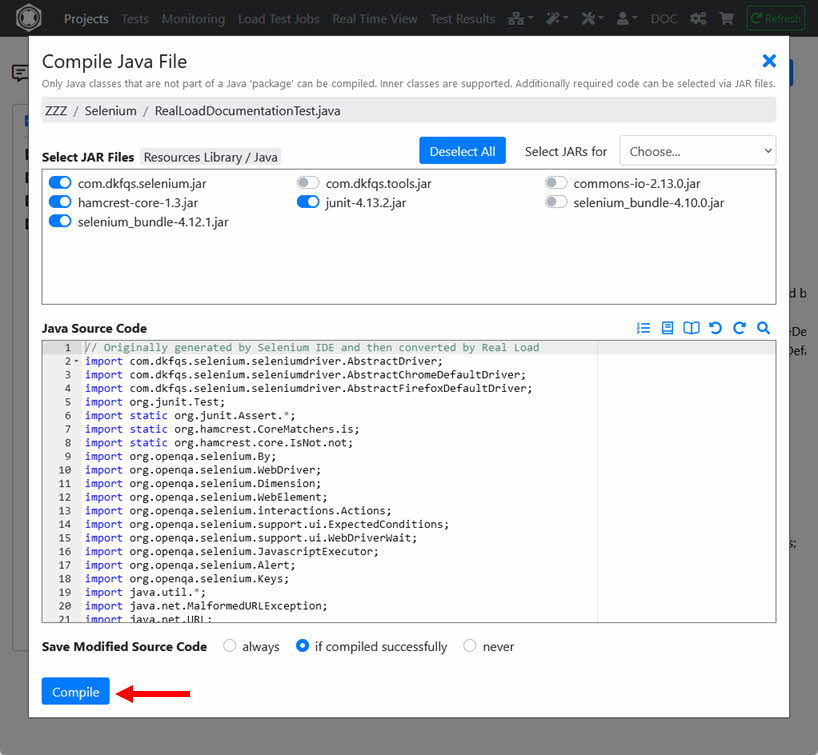
4. Compile the Converted JUnit File
The JAR files required to compile are already preselected, i.e. you need only click the ‘Compile’ button.
After successful compilation, click ‘Define or Update Selenium by JUnit Test’.
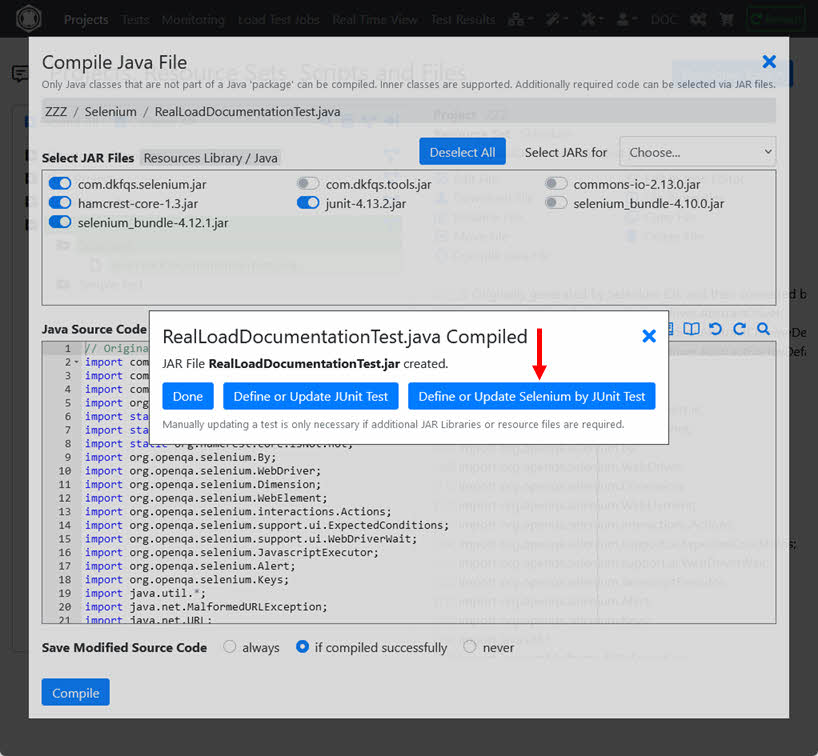
You will then be automatically redirected to the Define JUnit & Selenium Test dialog.
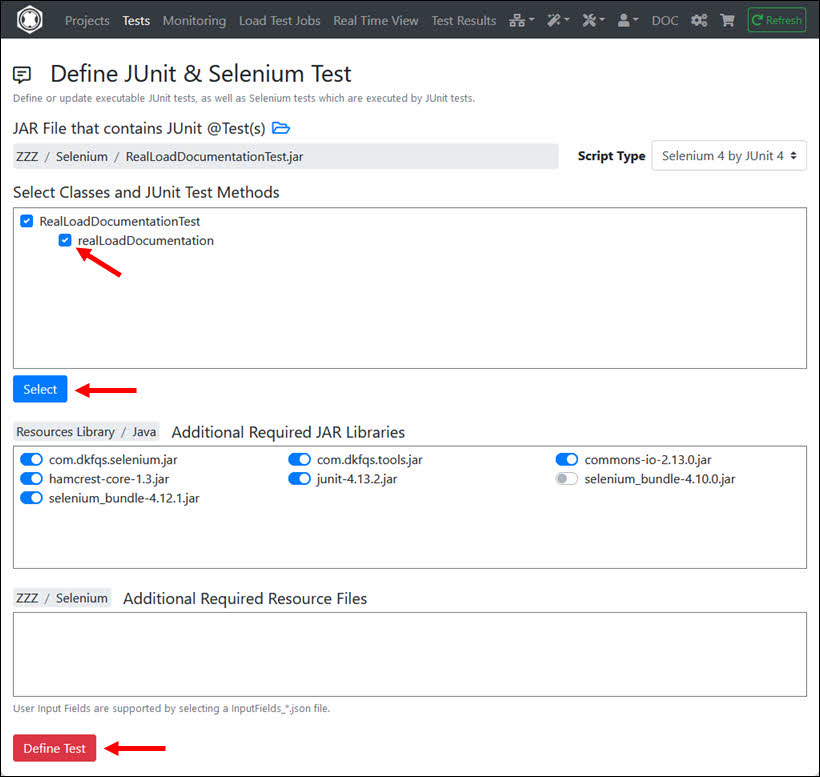
5. Define the Selenium RealLoad ‘Test’
Select the JUnit @Test method (in this case only one will be shown) and click ‘Define Test’.
In an intermediate step you can enter an (optional) test description.
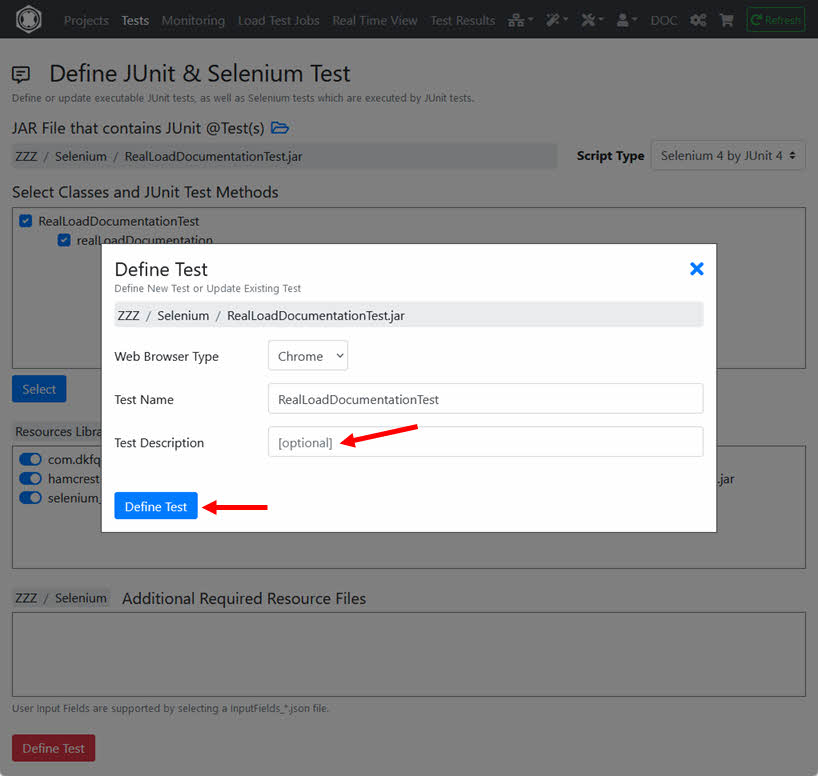
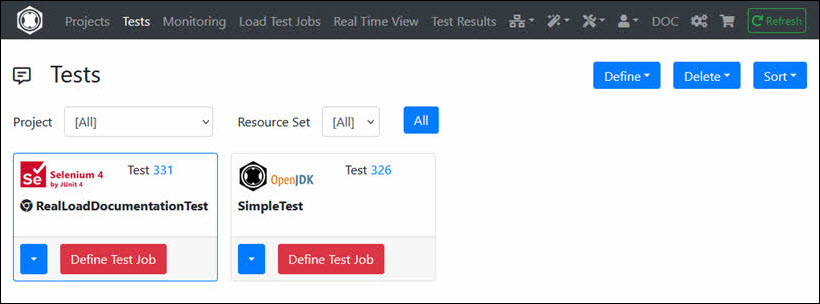
Now the Selenium RealLoad ‘Test’ is defined from which you can define a Load Test Job and/or a Monitoring Job.
6. Note about Measuring Agents
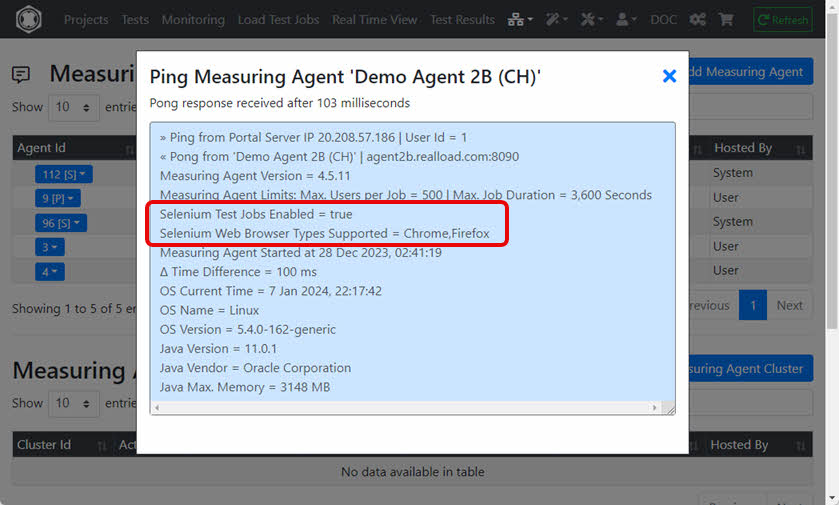
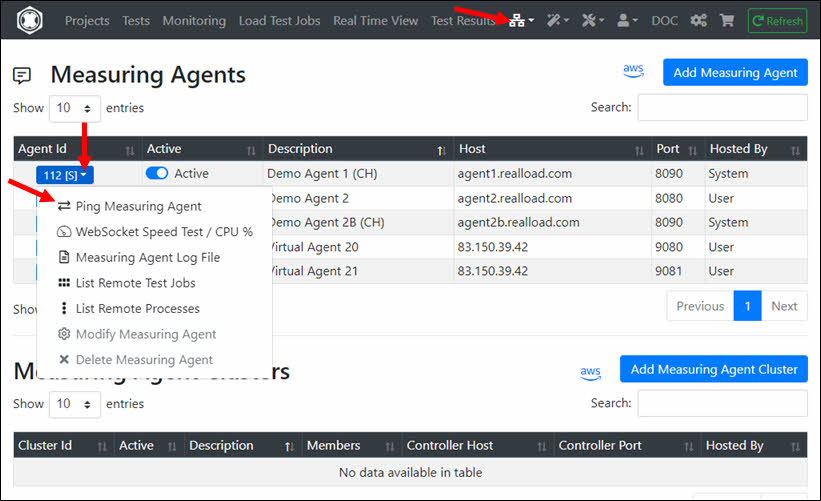
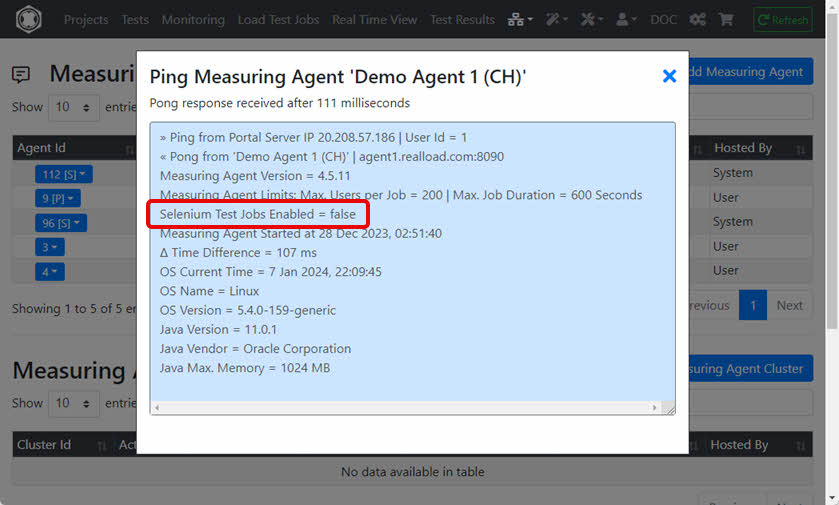
Please note that not all Measuring Agents support the execution of Selenium jobs. You can ‘ping’ a Measuring Agent at application level to find out whether Selenium jobs are supported:
Example 1: Measuring Agent ‘Demo Agent 1 (CH)’ does not support Selenium jobs
Example 2: Measuring Agent ‘Demo Agent 2B (CH)’ supports Selenium jobs